With the bike now a year old I felt motivated to change the fork oil for the first time. Oh, for the days when forks had drain plugs and the legs didn't need to be removed to change the oil.
The handbook calls for 400cc of oil (5W up to 20W – that's a big viscosity range!) per leg. I opted to use 450cc of 15W in line with a recommendation here for increased damping, and air-springing effect at full compression. As it turned out I measured 450cc of oil removed from each leg. When you consider that all the oil is not able to be removed, saved and measured, I suspect that each leg had been given about 470cc at the factory. The old oil was darkish in colour but quite clean and with none of the yellowing which moisture causes. There were the normal metal specks from running-in but nothing of concern. Viscosity was difficult to judge.
The task took me 2.5 hours, which included time for coffee as the legs drained of kerosene, but a real mechanic would probably do it in 2 hours.
Here's how I went about the task:
• Place the bike on the centrestand and place timber blocks under the sump so that the front tyre is clear of the floor.
• Loosen the outer handlebar riser screw accessible from under the fork crown. (top triple clamp) This is necessary to allow the crown to open and release the stanchion when the pinch screw is loosened. (In-hex 6mm)
• Loosen the crown pinch screw to release the stanchion. (In-hex 6mm)
• Loosen the fork leg top plug. (28 mm socket)
• Remove the front mudguard. (In-hex 4mm)
• Remove the brake calipers and leave them on the hoses. (In-hex 7mm)
• Disconnect the speedometer sensor from the right slider lower. (8mm socket) Cut away the two small cable ties fixing the cable to the slider inner lugs.
• Remove the front wheel. (In-hex 5mm for axle pinch screws and 30mm socket for axle nut) (see "Breva front wheel removal")
• Note how many stanchion rings are showing above the crown. (mine had 3, which happens automatically if the stanchion is pushed up hard against the top stop)
• Loosen the paired pinch screws of the fork yoke. (bottom triple clamp)
• Slide the fork leg down and out of the bike. (Be ready in case the leg decides drop out!)
• Repeat for the second leg.
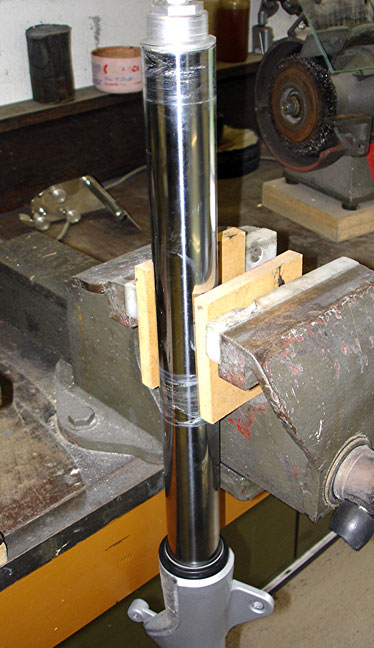
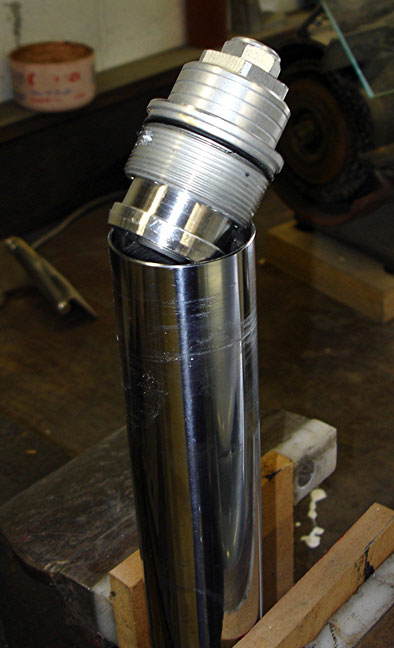
• Grip the fork stanchion lightly and vertically in a vice using jaw soft protection and remove the top plugs. (which come out easily but need a little downward pressure against the spring as you do so to ensure that the bottom threads are not damaged as the plug comes free)
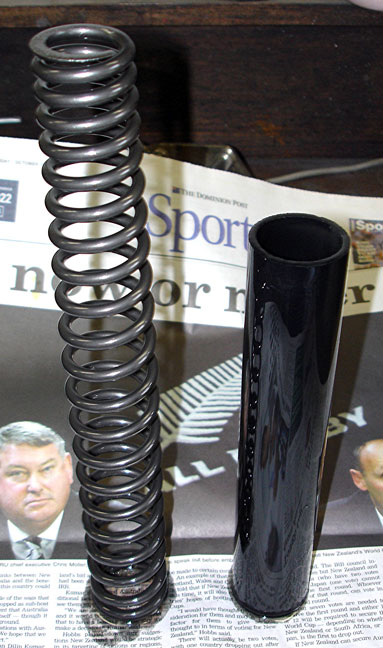
• Push the stanchion into the sliders and remove the spring. (the top of the spring is of smaller diameter than the bottom)
• Invert the legs over a container and drain out all the old oil. At the same time the spacer tubes will come out. Pump the legs in and out several times both upright and inverted to achieve complete drainage.
• Add about a cup of kerosene to each leg, pump upright and inverted several times, then drain to wash the internals. Allow to drain inverted for a while.
• Wash the springs and spacers with kerosene and allow to dry.
• Add new fork oil and pump the upright leg several times to prime the damping chambers.
• Extend the leg, hold the stanchion vertically in the vice and refit the spacer tube, spring, and top plug after lubricating the sealing O-ring. (again, apply a little downward pressure against the spring as you start to screw in the plug to ensure that the bottom threads are not damaged as the plug starts to engage)
• Refit the fork leg, pushing it up until it comes against the top stop, and tighten the yoke paired pinch screws.
• Tighten the top plug.
• Loosen the yoke pinch screws again and rotate the fork stanchion so that the top preload adjuster marks are sensibly and equally placed and ensure that the correct number of stanchion rings are showing above the crown.
• Re-assemble everything else in reverse order.