I am going to assume that you already have the following:
1. A burning desire for much better brake feel and stopping confidence.
2. The additional rotor
3. Six 8mm x 1.25 x 16mm long screws to attach it to the empty spot on the front hub where a rotor should have been from the factory
4. A suitable master cylinder with a 15mm or 16mm bore (the stock one is a 13mm and will not work properly with two calipers)
5. At least a quart of new brake fluid.
First, you'll need to remove the front wheel so you can attach to new rotor. Mine had a little black block-off plate that had some really short screws holding it on. I used longer ones for the rotor screws. Now, put the wheel back on. Don't forget to bounce the front suspension a couple of times before you tighten up the right-side pinch bolts.
Now, here's what you'll need to put together the hoses:
1. Russell part #R4050C - 35-degree banjo fitting. You'll need two of these pictured HERE
2. Russell part #R40431 - weird little fittings for the calipers. They come two to a pack pictured HERE
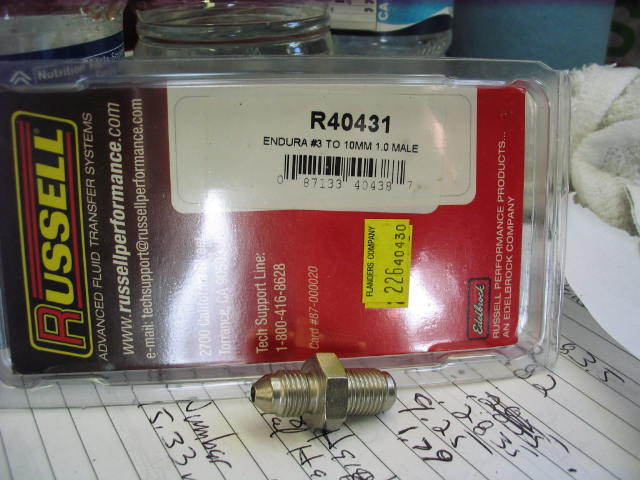
3. Russell part #R58132S - 34-inch universal brake hose pictured HERE
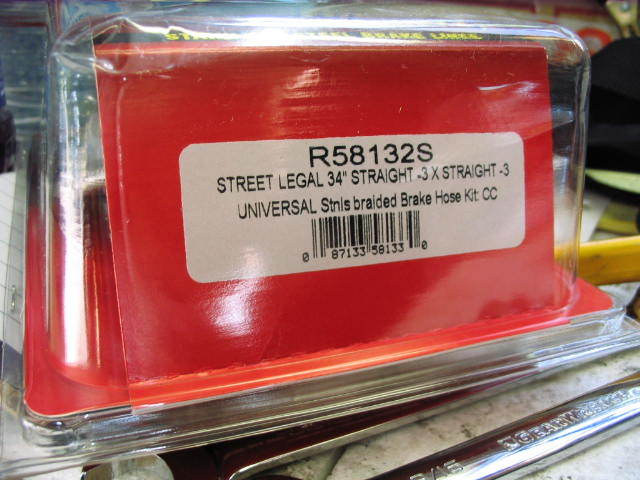
I used a 32-inch and a 34-inch for mine because I have Pro-Taper bars on my Jackal. If you are using the stock Jackal bars, you will probably need a 34-inch and a 36-inch hose. Measure your stock hose and get one that length and one more two inches longer for the left side. If you are doing this on a Stone with a single left caliper, you'll need a hose for the right side that is two inches shorter than your stock one.
Here's some pictures of mine all buttoned up:
1. The master cylinder HERE
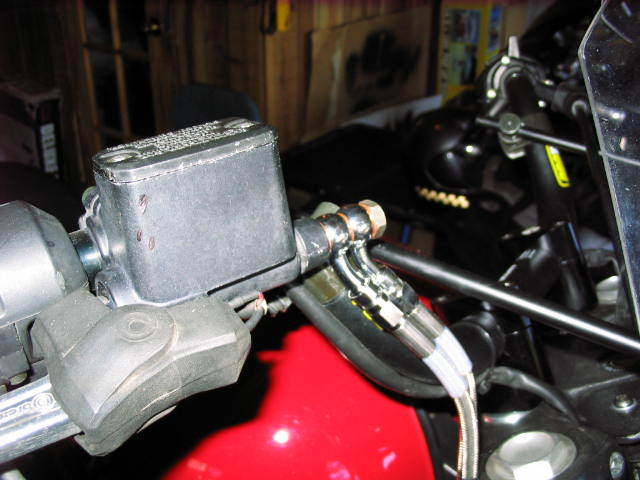
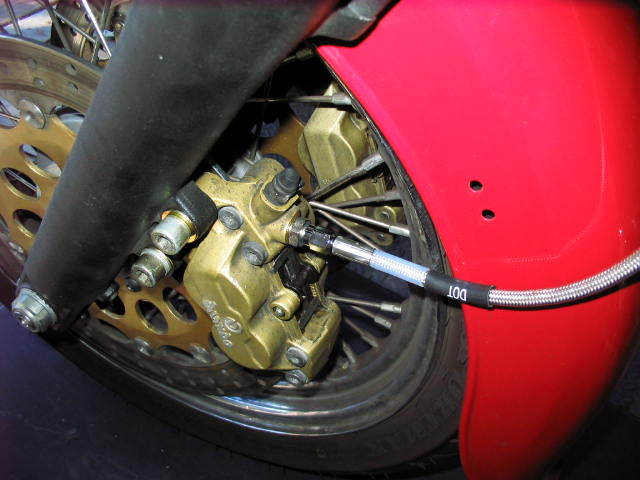
2. Right side HERE
3. Left Side HERE
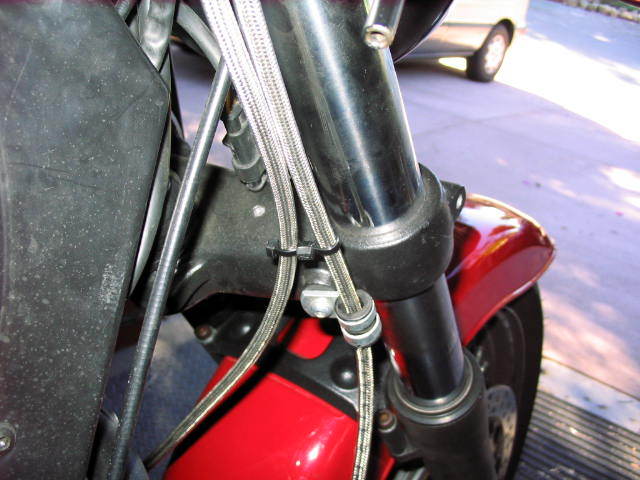
Check out this groovy little zip tie hose spacer HERE - I got this tip from Richard Rodriguez. Thanks, Richard.
After you get it all together, you'll need to bleed the brakes. This will be a lot easier if you have access to either a pressure bleeder or a vacuum bleeder because there's nothing but air in the lines, master cylinder, and calipers to start with, and pumping it all full of brake fluid with the brake lever will take quite a while. It is possible to do it this way, but it goes a lot faster with one of those little vacuum pump kits from your local Auto Parts stores.
Even after I got all of the air out, I let the bike sit overnight with a small bungee cord holding the front brake lever in. The lever was solid the next morning.
I was able to locate a pair of calipers and the master cylinder off of a mid-to-late 90's Ducati 900SS. They have the same 40mm caliper bolt spacing as my Jackal.
If you don't mind spending a bit more $$ to do this, all of the necessary Brembo bits are available from GuzziTech, who are now Brembo dealers. The advantage to doing this with all new parts is that it takes a lot less time because the used ones likely require some amount of attention to get them into workable condition. Mine certainly did.
Oh, and definitely go with new pads.
The results are that now a two-finger squeeze on the front brake lever produces some SERIOUS retardation of the motorcycle compared to the previous single-disc setup. Plus, this retardation is available each and every time you want/need it because the brakes don't fade now like they used to.
All-in-all, this is a really big improvement in the riding experience on my bike.
I'll bet it will be on yours, too.
Ride safe and WEAR YOUR GEAR!!
Jack Price (aka profwacko on the webboard)